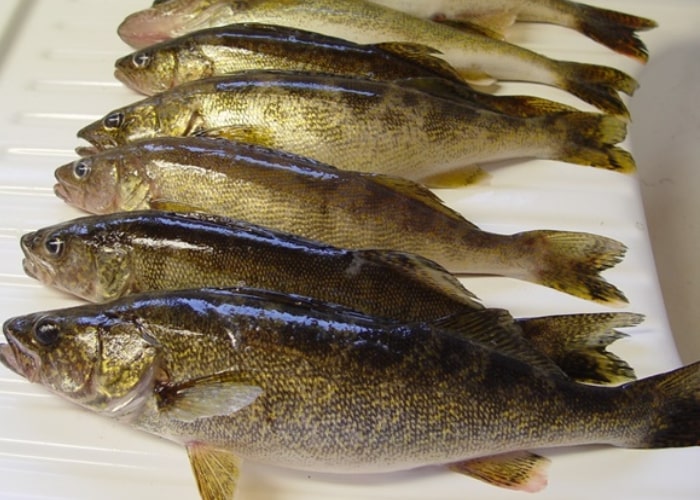
Walleye, also known as the “eyed perch,” is one of the most delicious and beloved freshwater fish in North America. Filleting a walleye not only allows you to maximize the wonderful flavor of this fish but also serves as a useful skill for picnics or family gatherings. Therefore, learning how to fillet walleye is a skill that anyone who loves cooking and fishing should know. Join us as we explore the basic steps to easily fillet a walleye!
How to fillet walleye, you need to prepare the following tools:
- Fillet knife: Choose a knife with a long, thin, and flexible blade. The best fillet knife for walleye usually has a blade between 6 and 8 inches.
- Cutting board: Use a large wooden or plastic cutting board.
- Fish clamp (optional): To keep the fish steady while filleting.
- Clean cloth: To wipe your hands and knife.
- Water bucket: to rinse the fish during the cleaning walleye process.
Preparing the walleye for filleting
- Clean the fish: Rinse off any dirt and scales. If necessary, use a soft brush to gently scrub the surface of the fish.
- Chill the fish: Place the fish in the refrigerator for at least 30 minutes before filleting the walleye. This helps firm up the flesh, making it easier to cut and preventing tearing the flesh.
- Place the fish on the cutting board: Position the fish horizontally with the head facing you. Use a clean cloth to keep the fish from slipping.
Step-by-step walleye filleting
Separating the flesh from the bone
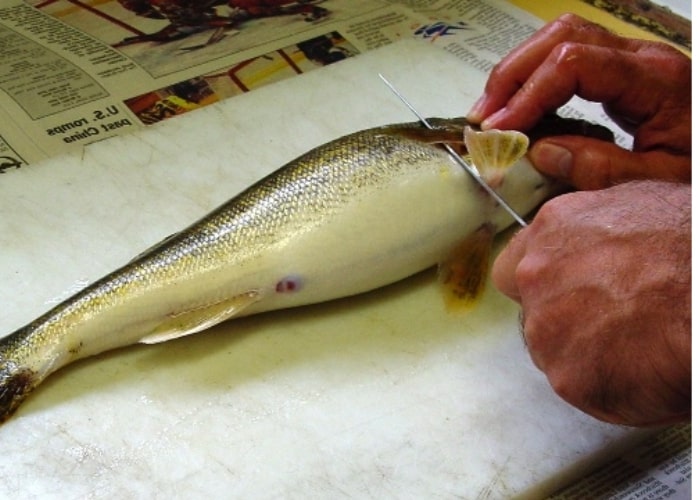
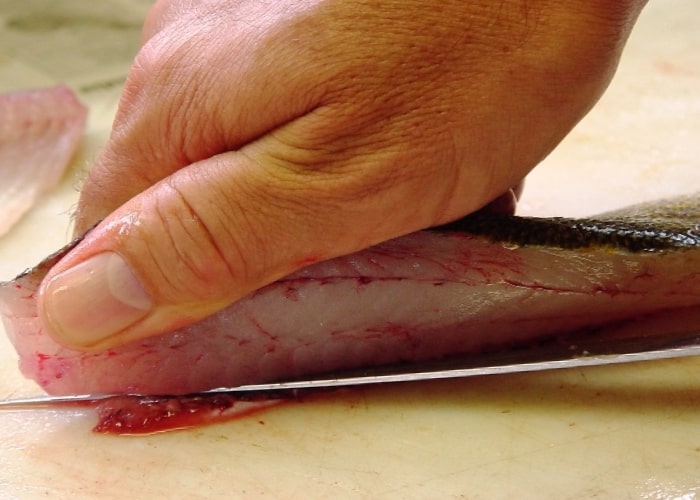
- Start by placing the fish’s belly facing you and using your non-dominant hand to hold the fish’s head. Use a knife to cut right behind the gills, from top to bottom, until reaching the backbone.
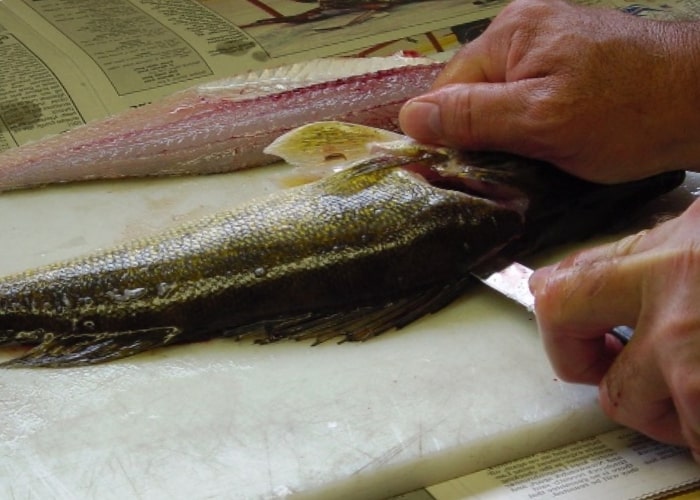
Rotate the cutting knife along the backbone to the tail and out - Then, rotate the cutting knife along the backbone to the tail and out. The entire side of the fish peeled off, and the rest of the rib cage remained attached to the fillet. Separating the flesh from the bone
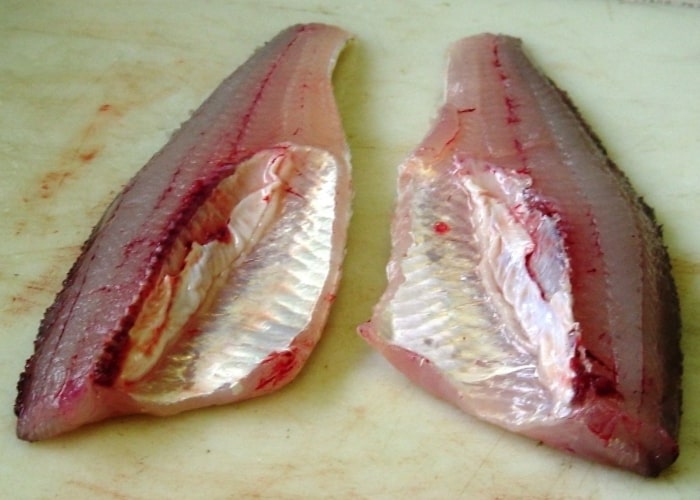
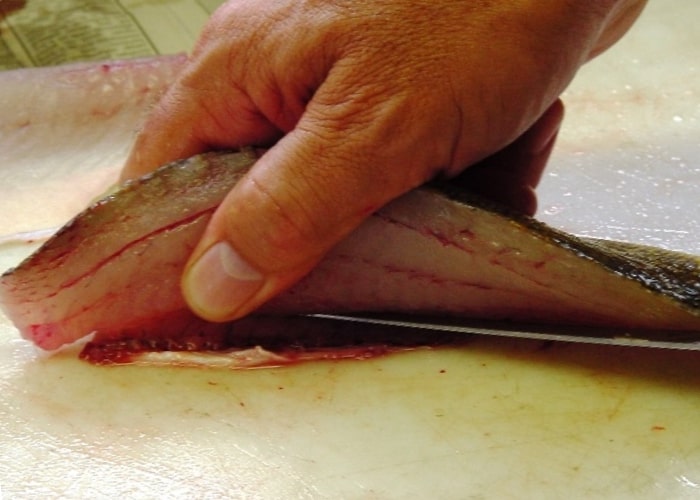
You now have two fillets - Turn the fish over so the back side is facing you. Repeat the process. You now have two fillets with the ribs intact and waiting to be removed.
Removing the Ribs
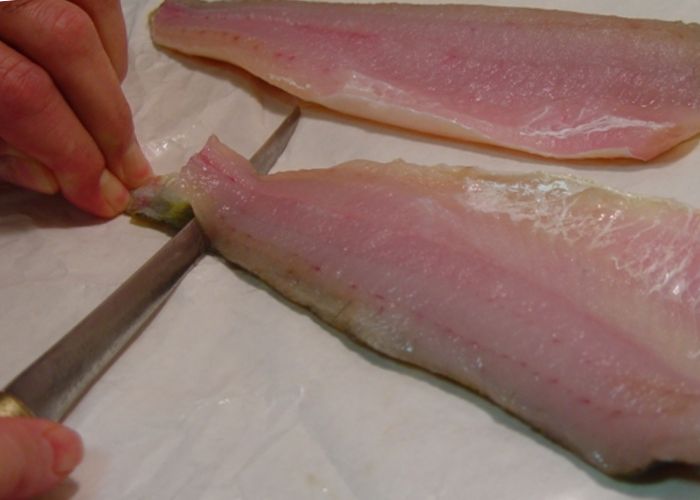
- Whichever of the two fillets you plan to bone, place the fillet’s rib cage side down, placing the knife at the forward end of the fillet and just above the rib cage. Use one hand to press down on the fish to flatten the ribs. Cut towards the belly of the fish along the ribs, gradually moving towards the back.
Removing the Ribs - Check for small bones: Use your fingers to feel for them, and use tweezers to pluck out any remaining small bones.

Removing the Ribs
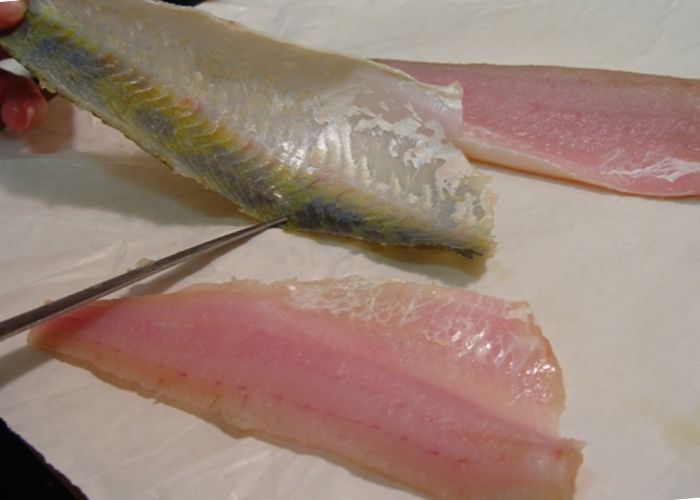
Skinning the Fillet (Optional)
- Skin the fillet: Use your non-dominant hand to grasp the tail of the fillet with the rest of the fillet facing away from you.

Skinning the Fillet - Use a fillet knife to cut at a moderate angle until it touches the skin, and begin to slide the knife between the meat and skin. Make sure the blade is at a very shallow angle between the meat and the skin.
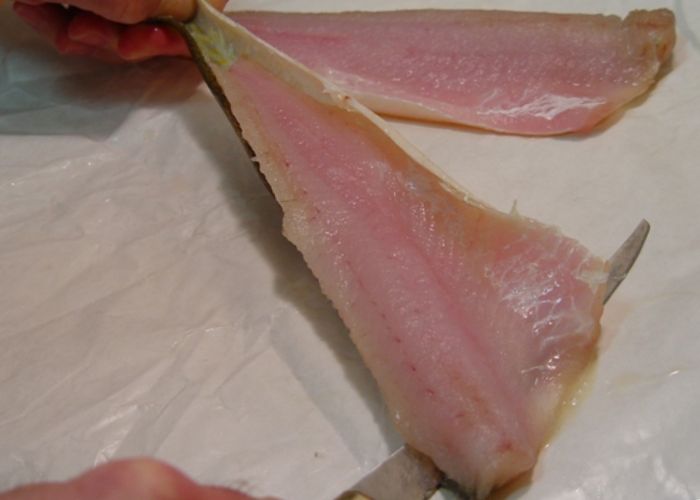
Skinning the Fillet Move the knife towards the other end of the fillet. At the same time, you can start pulling the tail away and in the opposite direction of the knife, and now you have a boneless and skinless fillet.
Skinning the Fillet
Conclusion
Filleting walleye is an important and useful skill. Following these steps, you can easily perform the task and enjoy the delicious walleye meat. Try it out and experience the difference between walleye and other fish.